| Linux 系统设置开机自动运行脚本的方法 | 您所在的位置:网站首页 › linux minio 开机启动 › Linux 系统设置开机自动运行脚本的方法 |
Linux 系统设置开机自动运行脚本的方法
Linux 系统设置开机自动运行脚本的方法 image-20230320072023593目录 image-20230320072023593目录 image-20230320201446159前言 image-20230320201446159前言在工作中,我们经常有个需求,那就是在系统启动之后,自动启动某个脚本或服务。在 Windows 下,我们有很多方法可以设置开机启动,但在 Linux 系统下我们需要如何操作呢? Linux 下同样可以设置开机启动,但可能需要我们敲一些命令(可能也有 UI 界面的设置方法,但我不熟,我更多是玩命令)。下面我们就介绍三种简单但可行的开机启动设置方法。 方法一:修改 /etc/rc.d/rc.local 文件 这种方法,在任何 Linux 系统上都可以使用。/etc/rc.d/rc.local 文件会在 Linux 系统各项服务都启动完毕之后再被运行。所以你想要自己的脚本在开机后被运行的话,可以将自己脚本路径加到该文件里。 测试环境centos7.6 1810测试软件:无 我们先来查看下这个文件的内容是什么[root@Devops6 ~]#ll /etc/rc.d/rc.local -rw-r--r--. 1 root root 473 Oct 31 2018 /etc/rc.d/rc.local [root@Devops6 ~]#cat /etc/rc.d/rc.local #!/bin/bash # THIS FILE IS ADDED FOR COMPATIBILITY PURPOSES # # It is highly advisable to create own systemd services or udev rules # to run scripts during boot instead of using this file. # # In contrast to previous versions due to parallel execution during boot # this script will NOT be run after all other services. # # Please note that you must run 'chmod +x /etc/rc.d/rc.local' to ensure # that this script will be executed during boot. touch /var/lock/subsys/local但是,首先需要确认你有运行这个文件的权限。[root@Devops6 ~]#chmod +x /etc/rc.d/rc.local [root@Devops6 ~]#ll /etc/rc.d/rc.local -rwxr-xr-x. 1 root root 473 Oct 31 2018 /etc/rc.d/rc.local为了演示,我们创建了一个脚本,当它被执行之后,将在家目录下写入有特定信息的文件。[root@Devops6 ~]#vim auto_run_script.sh #!/bin/bash date >> /root/output.txt hostname >> /root/output.txt保存退出后,再给它赋予可执行权限:[root@Devops6 ~]#chmod +x auto_run_script.sh [root@Devops6 ~]#ll auto_run_script.sh -rwxr-xr-x 1 root root 472 Mar 20 06:55 auto_run_script.sh然后,我们再将脚本添加到 /etc/rc.d/rc.local 文件最后一行:[root@Devops6 ~]#vim /etc/rc.d/rc.local /root/auto_run_script.sh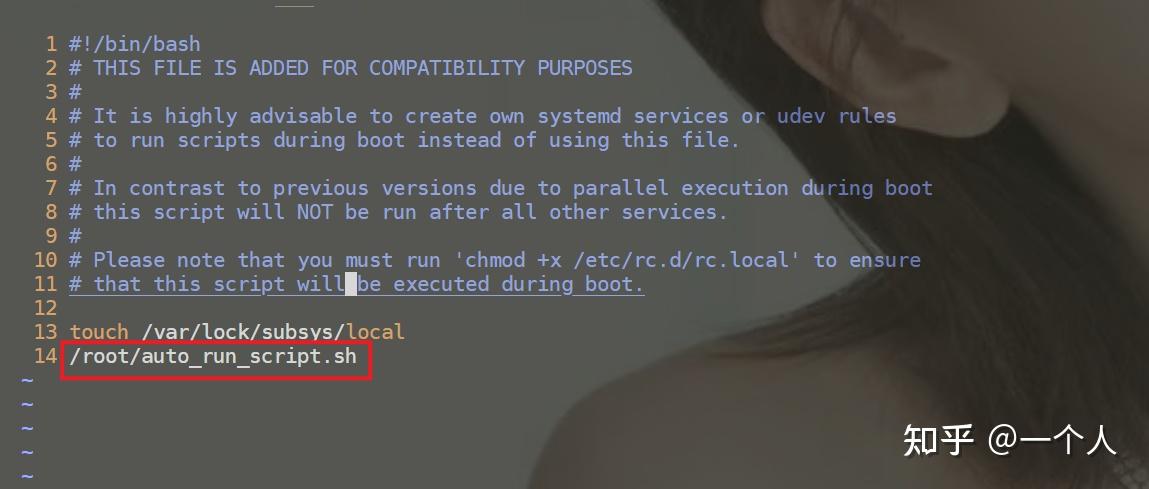 image-20230320065648303接下来,我们就可以试试效果了。直接重启系统就可以了:[root@Devops6 ~]#ll
total 4
-rwxr-xr-x 1 root root 472 Mar 20 06:55 auto_run_script.sh
[root@Devops6 ~]#reboot重启后观察现象[root@Devops6 ~]#ll
total 8
-rwxr-xr-x 1 root root 472 Mar 20 06:55 auto_run_script.sh
-rw-r--r-- 1 root root 37 Mar 20 06:58 output.txt
[root@Devops6 ~]#cat output.txt
Mon Mar 20 06:58:04 CST 2023
Devops6 image-20230320065648303接下来,我们就可以试试效果了。直接重启系统就可以了:[root@Devops6 ~]#ll
total 4
-rwxr-xr-x 1 root root 472 Mar 20 06:55 auto_run_script.sh
[root@Devops6 ~]#reboot重启后观察现象[root@Devops6 ~]#ll
total 8
-rwxr-xr-x 1 root root 472 Mar 20 06:55 auto_run_script.sh
-rw-r--r-- 1 root root 37 Mar 20 06:58 output.txt
[root@Devops6 ~]#cat output.txt
Mon Mar 20 06:58:04 CST 2023
Devops6符合预期。 方法二:使用 crontab 这种方法,在任何 Linux 系统上都可以使用。测试环境centos7.6 1810测试软件:无 大家知道,crontab 是 Linux 下的计划任务,当时间达到我们设定的时间时,可以自动触发某些脚本的运行。 我们可以自己设置计划任务时间,然后编写对应的脚本。但是,有个特殊的任务,叫作 @reboot ,我们其实也可以直接从它的字面意义看出来,这个任务就是在系统重启之后自动运行某个脚本。 那它将运行的是什么脚本呢?我们如何去设置这个脚本呢? 为了演示,我们创建了一个脚本,当它被执行之后,将在家目录下写入有特定信息的文件。[root@Devops6 ~]#vim auto_run_script2.sh #!/bin/bash date >> /root/output2.txt hostname >> /root/output2.txt保存退出后,再给它赋予可执行权限:[root@Devops6 ~]#chmod +x auto_run_script2.sh [root@Devops6 ~]#ll auto_run_script2.sh -rwxr-xr-x 1 root root 472 Mar 20 06:55 auto_run_script2.sh我们可以通过 crontab -e 来设置。@reboot /root/auto_run_script2.sh但是这里编辑完,有提示一些异常log:(这里的log可忽略,最后的效果符合预期。)  image-20230320070329695#查看也是有定时任务的
[root@Devops6 ~]#crontab -l
@reboot /root/auto_run_script2.sh然后,直接重启即可。运行的效果跟上面类似。#重启
[root@Devops6 ~]#reboot
#观察效果
[root@Devops6 ~]#ll
total 16
-rwxr-xr-x 1 root root 474 Mar 20 07:01 auto_run_script2.sh
-rwxr-xr-x 1 root root 472 Mar 20 06:55 auto_run_script.sh
-rw-r--r-- 1 root root 37 Mar 20 07:04 output2.txt
-rw-r--r-- 1 root root 74 Mar 20 07:04 output.txt
[root@Devops6 ~]#cat output2.txt
Mon Mar 20 07:04:19 CST 2023
Devops6
#可以看到,是符合预期的。方法三:使用 systemd 服务测试环境centos7.6 1810 image-20230320070329695#查看也是有定时任务的
[root@Devops6 ~]#crontab -l
@reboot /root/auto_run_script2.sh然后,直接重启即可。运行的效果跟上面类似。#重启
[root@Devops6 ~]#reboot
#观察效果
[root@Devops6 ~]#ll
total 16
-rwxr-xr-x 1 root root 474 Mar 20 07:01 auto_run_script2.sh
-rwxr-xr-x 1 root root 472 Mar 20 06:55 auto_run_script.sh
-rw-r--r-- 1 root root 37 Mar 20 07:04 output2.txt
-rw-r--r-- 1 root root 74 Mar 20 07:04 output.txt
[root@Devops6 ~]#cat output2.txt
Mon Mar 20 07:04:19 CST 2023
Devops6
#可以看到,是符合预期的。方法三:使用 systemd 服务测试环境centos7.6 1810测试软件:无 次方法仅适用于 systemd 系统。如何区分是不是 systemd 系统?很简单,只需运行 ps aux 命令,查看 pid 为 1 的进程是不是 systemd 。[root@Devops6 ~]#ps aux|more USER PID %CPU %MEM VSZ RSS TTY STAT START TIME COMMAND root 1 0.3 0.2 43380 3728 ? Ss 07:04 0:00 /usr/lib/systemd/systemd --switched-root --system --deserialize 22 root 2 0.0 0.0 0 0 ? S 07:04 0:00 [kthreadd] root 3 0.0 0.0 0 0 ? S 07:04 0:00 [ksoftirqd/0] ……为了演示,我们创建了一个脚本,当它被执行之后,将在家目录下写入有特定信息的文件。[root@Devops6 ~]#vim auto_run_script3.sh #!/bin/bash date >> /root/output3.txt hostname >> /root/output3.txt保存退出后,再给它赋予可执行权限:[root@Devops6 ~]#chmod +x auto_run_script3.sh [root@Devops6 ~]#ll auto_run_script3.sh -rwxr-xr-x 1 root root 472 Mar 20 06:55 auto_run_script.sh为了实现目的,我们需要创建一个 systemd 启动服务,并把它放置在 /etc/systemd/system/目录下。我们创建的 systemd 启动服务如下。请注意,这时后缀是 .service ,而不是 .sh 。 $ vim /etc/systemd/system/auto_run_script3.service [Unit] Description=Run a Custom Script at Startup After=default.target [Service] ExecStart=/root/auto_run_script3.sh [Install] WantedBy=default.target从服务的内容可以看出来,我们最终还是会调用 /root/auto_run_script3.sh 这个脚本。 然后,我们再把这个脚本放置在 /etc/systemd/systerm/ 目录下,之后我们再运行下面两条命令来更新 systemd 配置文件,并启动服务。[root@Devops6 ~]#systemctl daemon-reload [root@Devops6 ~]#systemctl enable auto_run_script3.service Created symlink from /etc/systemd/system/default.target.wants/auto_run_script3.service to /etc/systemd/system/auto_run_script3.service.万事俱备之后,我们就可以重启系统啦。#重启 [root@Devops6 ~]#reboot #观察效果 [root@Devops6 ~]#ll total 24 -rwxr-xr-x 1 root root 474 Mar 20 07:01 auto_run_script2.sh -rwxr-xr-x 1 root root 474 Mar 20 07:13 auto_run_script3.sh -rwxr-xr-x 1 root root 472 Mar 20 06:55 auto_run_script.sh -rw-r--r-- 1 root root 111 Mar 20 07:14 output2.txt -rw-r--r-- 1 root root 37 Mar 20 07:14 output3.txt -rw-r--r-- 1 root root 148 Mar 20 07:14 output.txt [root@Devops6 ~]#cat output3.txt Mon Mar 20 07:14:57 CST 2023 Devops6 #可以看到,是符合预期的。关于我我的博客主旨: 排版美观,语言精炼;文档即手册,步骤明细,拒绝埋坑,提供源码;本人实战文档都是亲测成功的,各位小伙伴在实际操作过程中如有什么疑问,可随时联系本人帮您解决问题,让我们一起进步!微信二维码 x2675263825 (舍得), qq:2675263825。  image-20230107215114763 image-20230107215114763微信公众号 《云原生架构师实战》  image-20230107215126971 image-20230107215126971语雀 https://www.yuque.com/xyy-onlyone  image-20230306221144511 image-20230306221144511csdn https://blog.csdn.net/weixin_39246554?spm=1010.2135.3001.5421  image-20230107215149885 image-20230107215149885知乎 https://www.zhihu.com/people/foryouone  image-20230107215203185最后 image-20230107215203185最后好了,关于本次就到这里了,感谢大家阅读,最后祝大家生活快乐,每天都过的有意义哦,我们下期见! |
【本文地址】